One of the popular BaaS backend Service to quick charge your Flutter App
Flutter, a one in all solution for building software on all platforms of your choice. It supports a wide range of platforms but its strength lies in platforms like Android and iOS without compromising the performance and app load times.
Firebase, Google’s mobile and web app development platform that helps developers build apps and games that users will love. It’s like a toolkit full of handy resources that we can integrate seamlessly without worrying about writing code from scratch or learning a new stack just for backend.
These services include, Authentication, Firestore for storing and manipulating databases in real time, Crashlytics, and much, much more.
Out of all the frameworks, Firebase gels well with Flutter as it has good documentation and the integration for most of its features are just a few lines of code.
Firebase supports iOS, Android, web, and desktop platforms, so you can use the same backend for all your Flutter apps. This saves you time and money as you don’t have to maintain separate backends for different platforms. Basically, we can leverage the power of Flutter with the heavy services that Firebase offers for different platforms with ease.
Before we start, let’s gather the tools we need to embark on our first Flutter Firebase project.
Pre-Requisites
- Flutter Version: 3.27.1 (latest as of now)
- An IDE (to write code):Android Studio/ Visual Studio Code
- FlutterFire CLI
Setting Up Firebase Project:
Step 1:
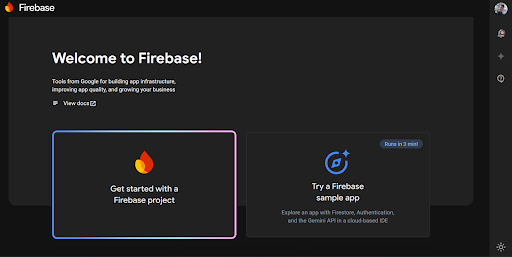
- Go to the Firebase Console. (You can login with google account to start your project.)

Step 2:
- Click on “Create a project” and follow steps as guided by the console to create a new project.
Choose Project Name of Your Liking
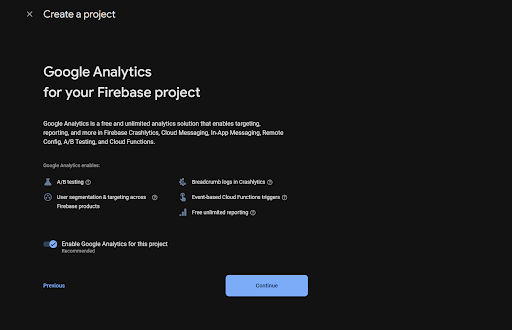
Enable Google Analytics
It’s a good idea to enable google analytics as Google Analytics for Firebase is a tool that provides real-time information about how users interact with an app. It also helps you understand how people use your web, Apple, or Android app. The SDK automatically captures a number of events and user properties and also allows you to define your own custom events to measure the things that uniquely matter to your business.
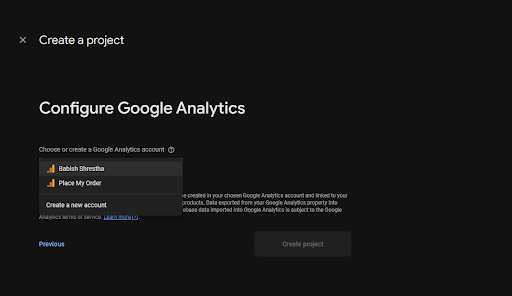
Enable Google AnalyticsChoose Your Account For Analytics
Here, I’m choosing my Google Account for Google Analytics to view reports and its dashboard.
Congrats! You’ve Created Your First Firebase Project.
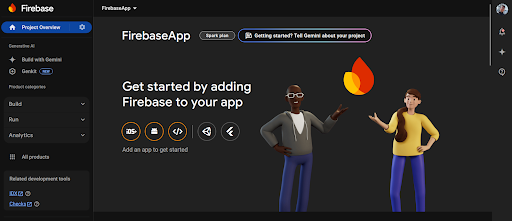
Getting Started with Your Project
Now, Let’s Setup Your Project with Firebase in desired platforms.
Note: You can set up on platforms using the FlutterFire CLI as well. Details given below.
For Android:
Step 1
- Click on Your Desired Platform. In my case, I’m choosing Android and iOS.
Note: In case you didn’t find it, you can look at the side panel. Navigate from “Project Overview”> ⚙️ >”Project Settings”. Scroll to bottom and choose your Platform.
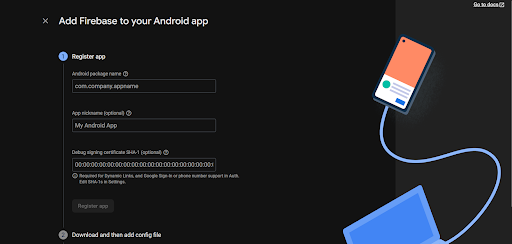
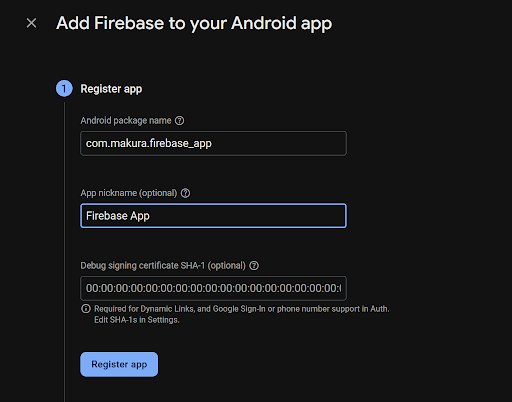
Step 2:
- Follow the steps for setting up an android app.
Step 3:
- Download the google-services.json and place it inside the android>app folder.
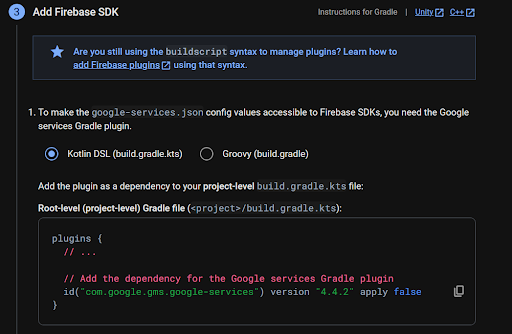
Step 4:
- Add necessary code to project level gradle file (android>build.gradle ) and app level gradle file (android>app>build.gradle).

Step 5:
- You’re all set for an android app.
For iOS
Similarly, for iOS, do the following :
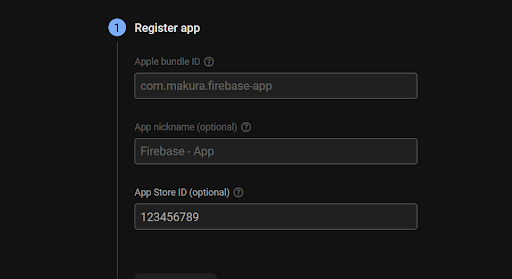
Step 1:
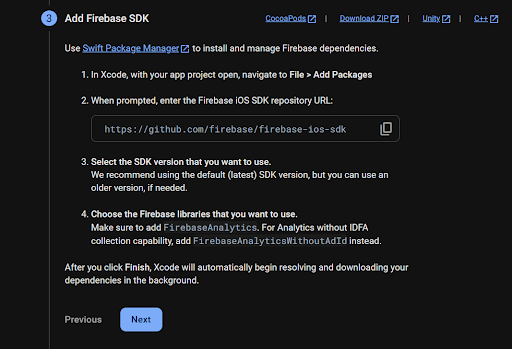
- Add Firebase SDK through swift package manager.
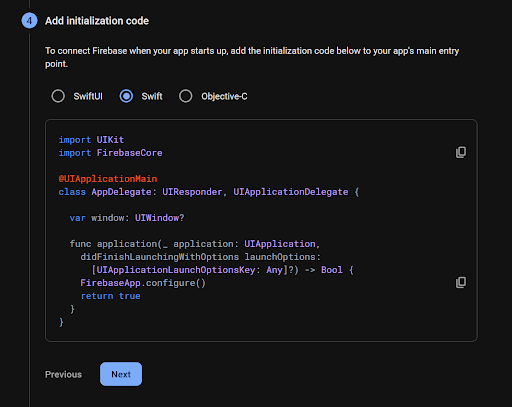
Step 2:
- Add initialization code for Swift.
Step 3 :
Okay. So, for iOS, let’s open up the project in Xcode. Let us first add the required firebase package as mentioned above.
Follow this instruction for details: https://github.com/firebase/firebase-ios-sdk/blob/main/SwiftPackageManager.md
Installing from Xcode
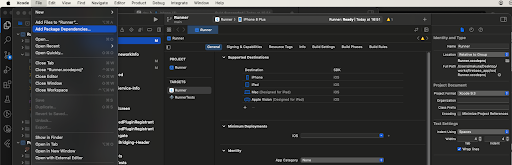
Step 1:
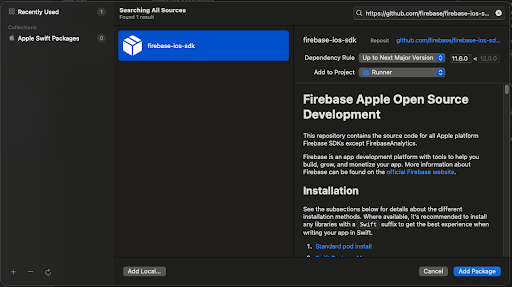
- Add a package by selecting File → Add Packages… in Xcode’s menu bar.
Step 2:
- Search for the Firebase Apple SDK using the repo’s URL:
https://github.com/firebase/firebase-ios-sdk.git
Next, set the Dependency Rule to be Up to the Next Major Version.
Then, select Add Package.
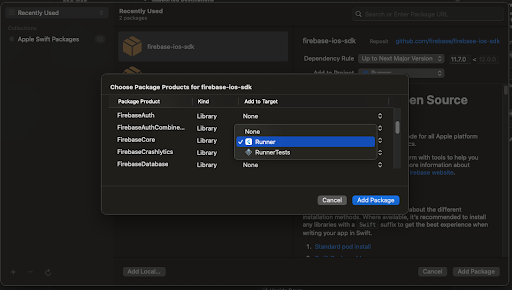
Step 3:
- Choose the Firebase products that you want installed in your app. And you should be set. I’ve chosen FirebaseCore, Firebase Analytics and Firebase Crashlytics as they are generally essential for monitoring app analytics and crash feedback.
Note: After installing sdk, go to your project in vscode.
Step 4:
- Now, let’s add GoogleService-Info.plist file to our iOS project. Download the file from your firebase console page. Navigate to
Project Overview > Project Settings > General. Scroll down to the end and select your iOS App. And click on Download.
https://console.firebase.google.com/
Step 5:
- After downloading, go to your XCode project. And the file to your project root as given below.
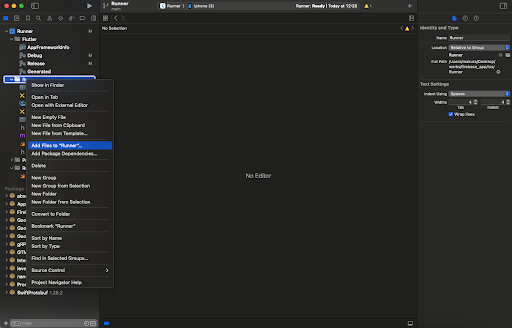
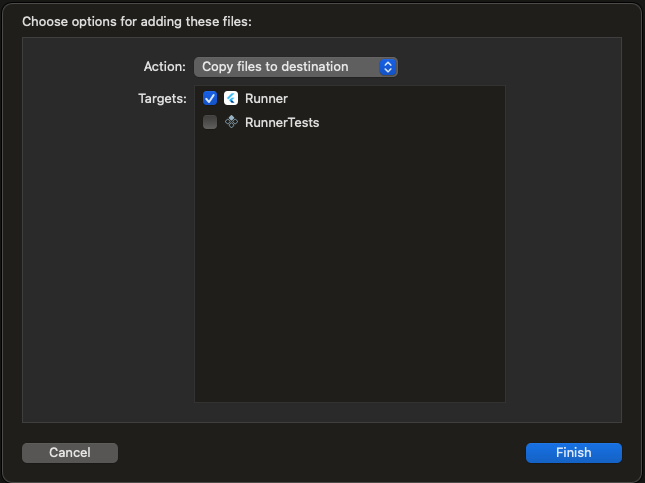
Step 6:
Now, you should be all set.
Setting Up Firebase in Code

- Let’s install flutter fire cli now. You can follow the documentation here.
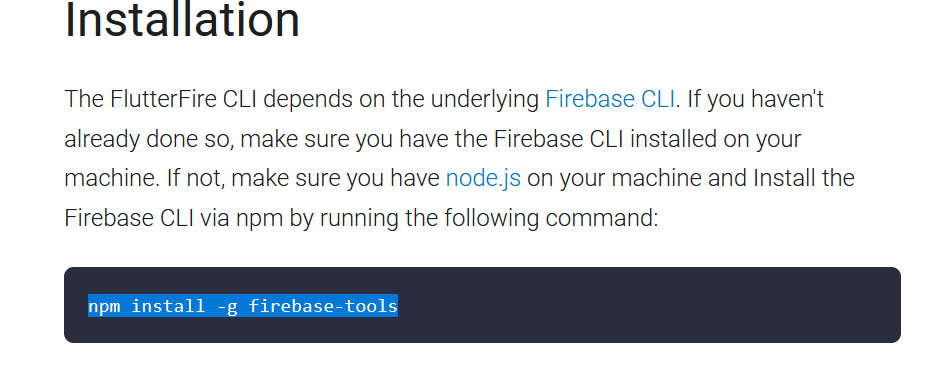
- After installing it, let’s activate it.
- Lets first login to firebase. After installing firebase tools, you can use:
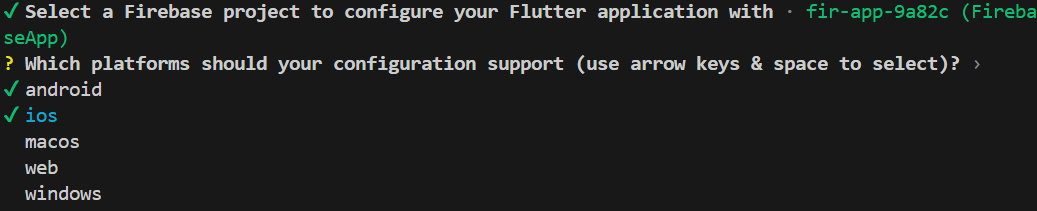
- Prompt what platforms (e.g. Android, iOS, macOS & web) you would like configuration for.
- Identify which Firebase applications for the chosen platforms should be used to extract configuration for. By default, the CLI will attempt to automatically match Firebase apps based on your current project configuration.
- Generate a firebase_options.dart file in your project.


- Enter your android application id.

- Enter your android application id.
- Let’s initialize the firebase in main.dart.
// Importing necessary packages
import 'package:flutter/material.dart';
import 'package:firebase_core/firebase_core.dart';
import 'firebase_options.dart'; // This file is auto-generated by Firebase CLI when setting up Firebase in the project.

Future<void> main() async {
// Ensures that widget binding is initialized before running the app.
// This is required to interact with the Flutter engine and use services like Firebase.
WidgetsFlutterBinding.ensureInitialized();

// Initialize Firebase with platform-specific options.
// The `DefaultFirebaseOptions` is a class that holds the Firebase configuration
// specific to each platform (e.g., Android, iOS, Web). It is auto-generated during setup.
await Firebase.initializeApp(
options: DefaultFirebaseOptions.currentPlatform, // Automatically selects platform-specific configuration.
);

// Runs the main app widget.
runApp(const MainApp());
}

class MainApp extends StatelessWidget {
const MainApp({super.key}); // Constructor for MainApp, marked as `const` for optimization.

@override
Widget build(BuildContext context) {
// The root of the application, a MaterialApp widget for material design styling.
return const MaterialApp(
home: Scaffold(
body: Center(
child: Text('Hello Firebase App!'),
),
),
);
}
}
And that’s it. Firebase has been integrated into your project. If you want more, I’m planning on making another tutorial for integration of Firebase Auth and Firestore Database with your project. Let me know in the comments. Thank you